Checkout Pro
When installing Checkout Pro, there may be an increase in the approval rate of online store sales. This happens because buyers will be able to pay using a Mercado Pago account and the entire purchase process will be done in our environment, which facilitates payment. At the end of the transaction, these buyers are redirected to the store environment.
Activate and configure payment method
-
To activate Checkout Pro, go to the settings in the WooCommerce panel (WooCommerce > Mercado Pago).
-
Click on 3. Activate and configure payment methods.
-
In the option "Checkout Pro", click on Configure.
-
The "Activate checkout" option allows you to enable or disable Checkout Pro on your store. To activate it, click on the switch.
-
In the Title on the store checkout field, enter the name by which this payment method will be identified in the store. For example, you can name it "Mercado Pago".
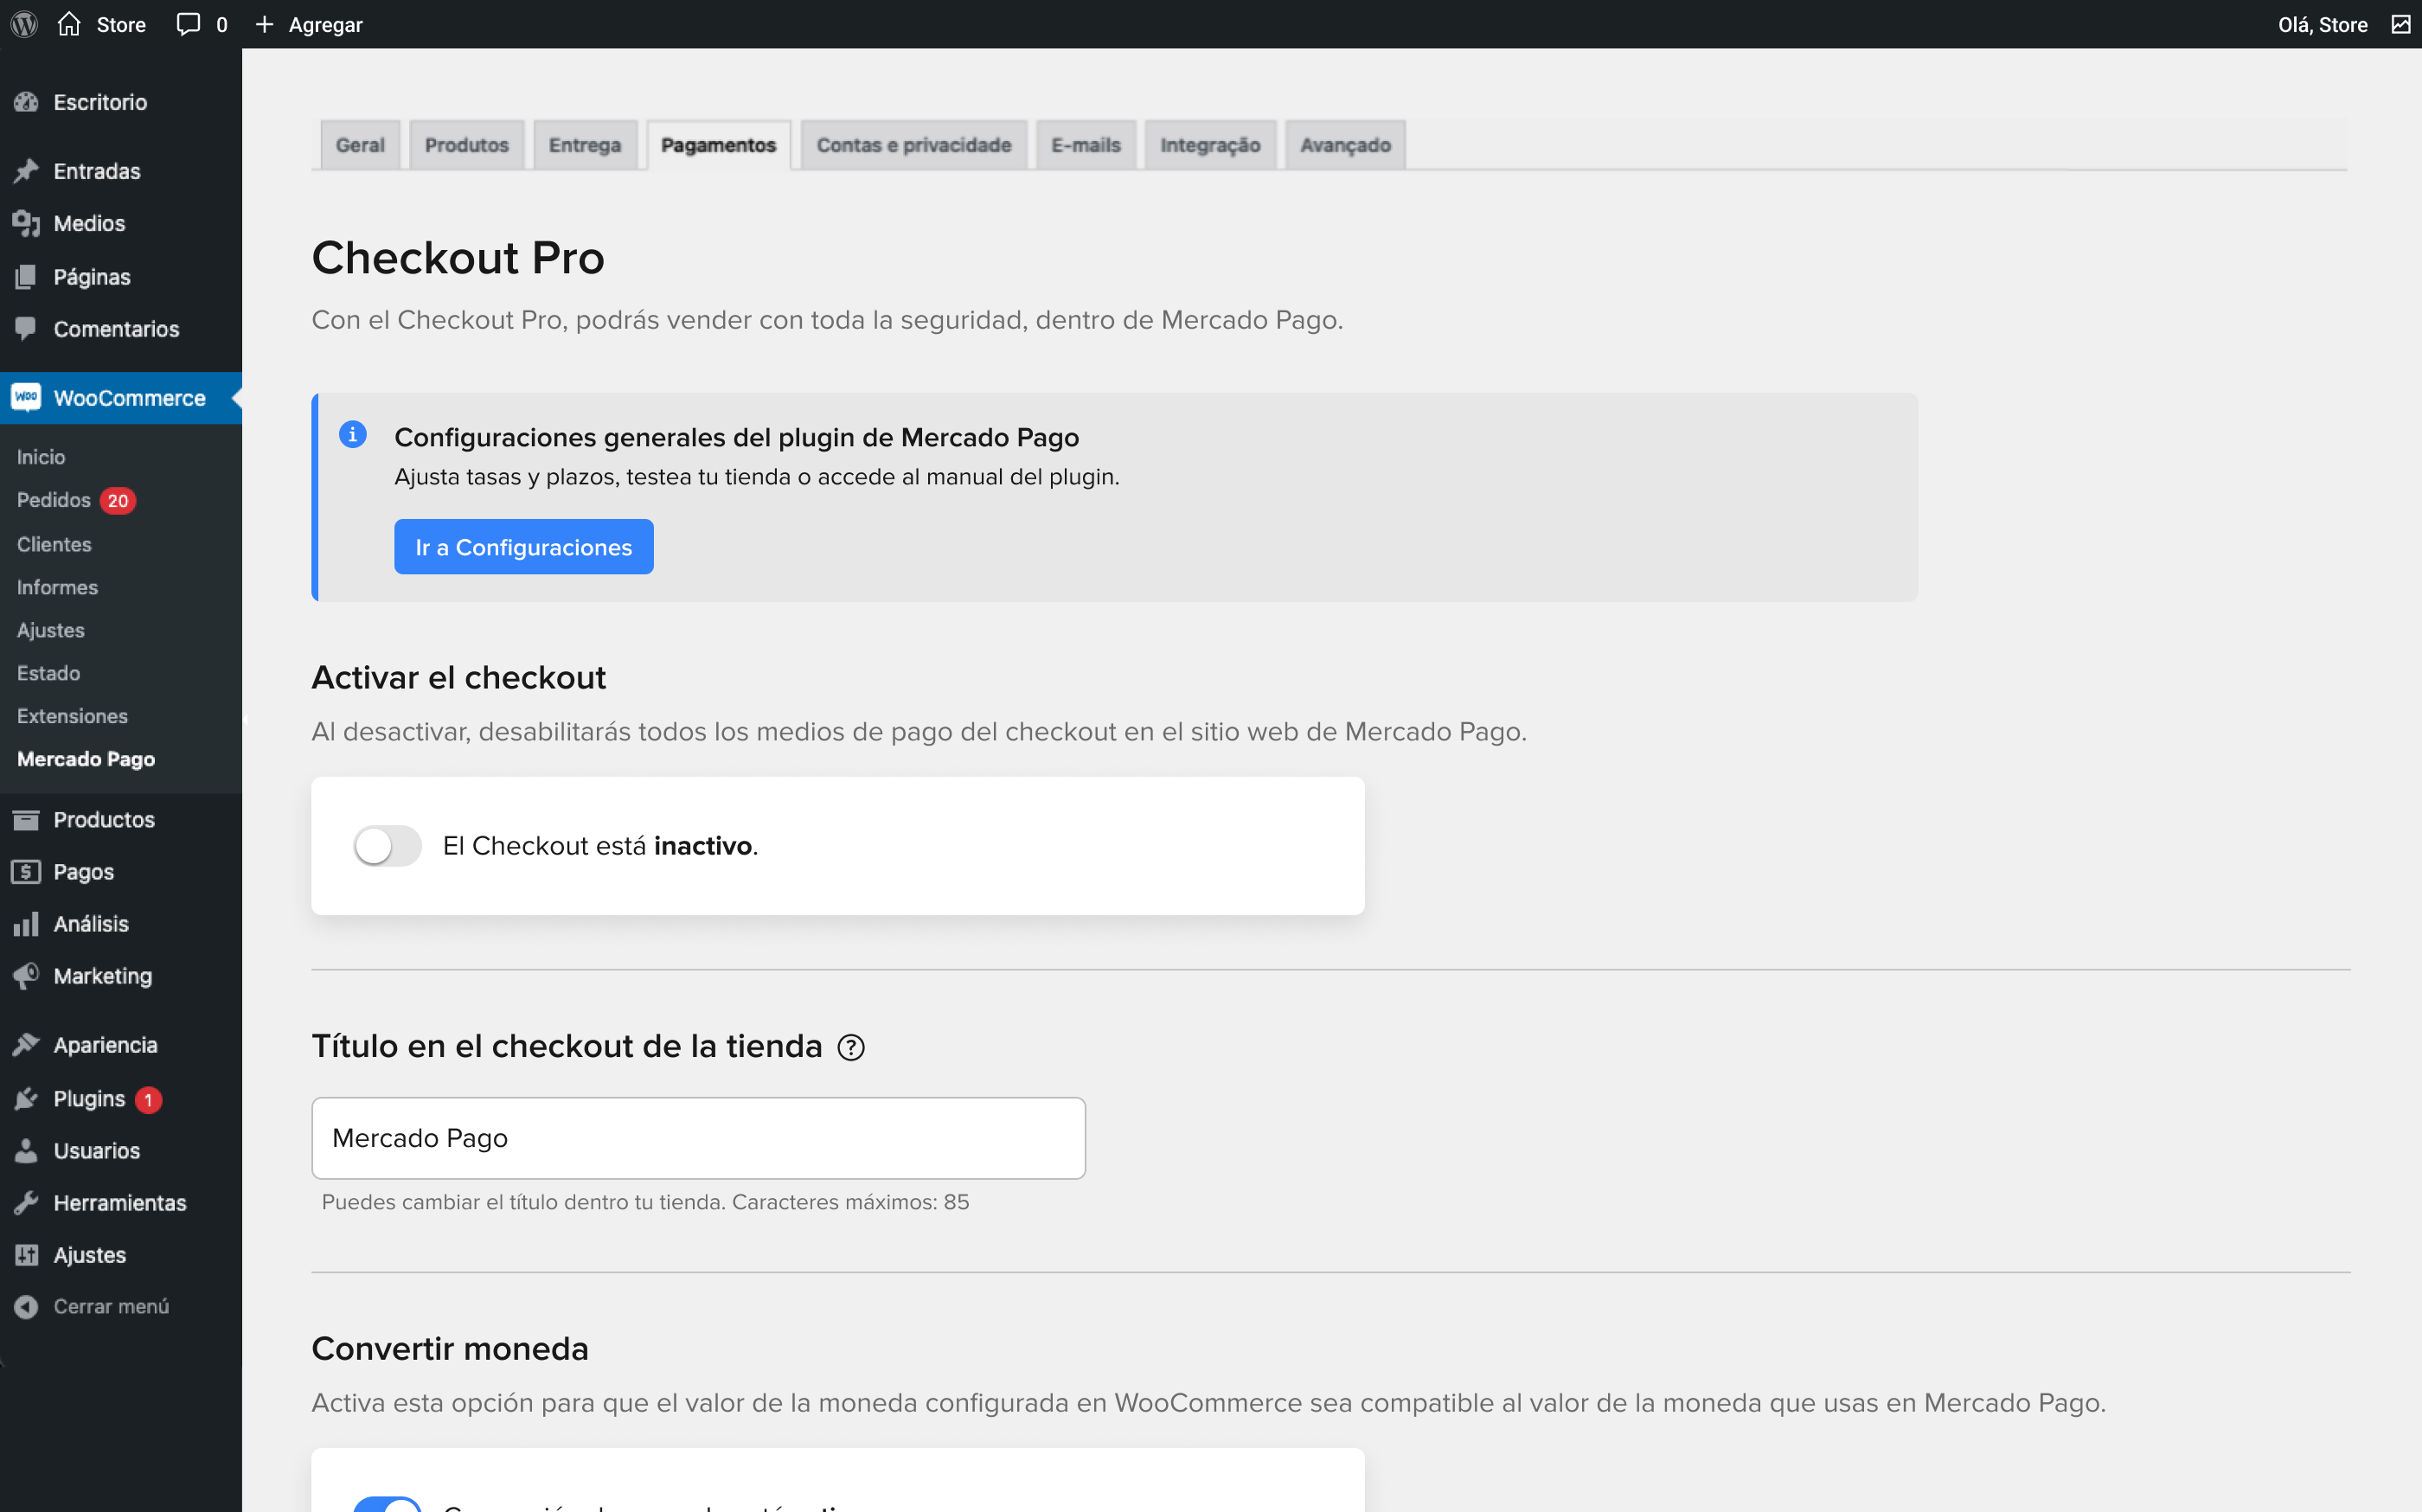
-
The Convert currency option allows the currency value configured in WooCommerce to be compatible with the currency value you use in Mercado Pago. To activate it, click on the switch.
-
In the Choose the accepted payment methods in the store section, choose which types and payment methods will be accepted in the store through Checkout Pro, which can be:
- Debit and credit cards.
- Cash (Mercado Pago account balance).
- Wire transfer.
- In the Maximum installments field, select the maximum number of installments you want to offer to your customers through Mercado Pago. You can choose to offer between 1 and 24 installments.
To save the changes in the configuration, click on the Save changes button.
Advanced settings
You can customize the options in the advanced settings section of the payment method, providing a more personalized experience in the store. To access these options, click on the Advanced settings title, and the following options will be displayed:
- Payment experience: Choose whether the payment experience will be within the store or redirecting customers to the Mercado Pago site.
- Return to store: Slide the button to choose whether you want the customer to return to the store once the payment is completed or if you prefer their shopping experience to end on the Mercado Pago site.
- Success URL: Enter a custom success URL to redirect customers once they have completed the purchase.
- Rejected payment URL: Enter a custom URL to redirect customers if the payment has been rejected.
- Pending payment URL: Enter a custom URL to redirect customers if the payment is pending approval.
- Automatic rejection of payments without instant approval: Activate this option to automatically reject payments that are not approved instantly. To activate it, slide the button. Keep in mind that we've already ensured security in your high-risk transactions with 3DS (3-Domain Secure), offering benefits such as higher approval rates and lower fraud risk.
- Discount on Mercado Pago payments: Enter a percentage discount for customers paying with this payment method. To activate it, enter a discount percentage and check the "Activate and show this information on the Mercado Pago checkout" option.
- Commission on Mercado Pago payments: Enter an additional percentage value you want to charge as a commission to customers choosing this payment method. To activate it, enter a discount percentage and check the "Activate and show this information on the Mercado Pago checkout" option.
To save the changes in the configuration, click on the Save changes button.
At checkout, when buyers choose to pay with Mercado Pago, information is displayed that highlights the exclusive advantages of paying with a Mercado Pago account:
- Pay faster: use cash or available balance in your Mercado Pago account.
- Installment: interest-free installments at selected banks.
- Purchase protection: login with the same e-mail and password as Mercado Libre.
